stable-diffusion-webui 安装教程
1.Required Dependencies Python 3.10.6 and Git 必备条件安装wget、git、Python 3以及Python 3的虚拟环境模块,主要安装虚python3 虚拟模块,可以参考 https://seealso1884.blogspot.com/2023/10/ubuntupyenv.html
2.下载文件原始包
Code from this repository:preferred way: using git: git clone https://github.com/AUTOMATIC1111/stable-diffusion-webui.git.
This way is preferred because it lets you update by just running git pull.
3.运行安装文件以及依赖环境,使用虚拟环境安装参考 1.0
Install and Run on NVidia GPUs
Enter these commands, which will install webui to your current directory
Run webui.sh
Check webui-user.sh for options.
pyenv virtualenv 3.10.6 diffuenv3.运行安装文件以及依赖环境,使用虚拟环境安装参考 1.0
Install and Run on NVidia GPUs
Enter these commands, which will install webui to your current directory
Run webui.sh
Check webui-user.sh for options.
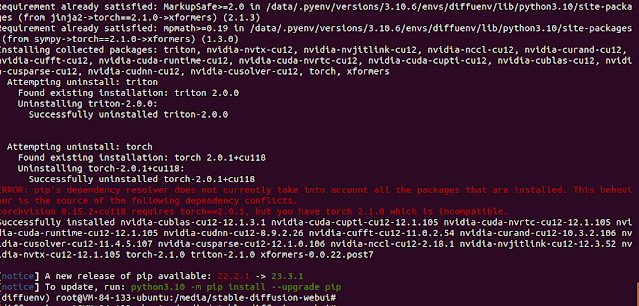
'xformers'. 模块事实上是可以进行忽略,如果要进行更新安装,运行完安装命令。
如果出现因安装xformers而卸载已经安装好的torch,可以先直接卸载torch和xformers,再运行webui-user.sh 脚本,重新安装torch
重新安装之后的版本如下:
再重新安装pip install xformer-0.0.20
可以直接使用 pip install xformer-0.0.20
参考:https://blog.csdn.net/Louis_12345/article/details/133636539
如果出现因安装xformers而卸载已经安装好的torch,可以先直接卸载torch和xformers,再运行webui-user.sh 脚本,重新安装torch
重新安装之后的版本如下:
再重新安装pip install xformer-0.0.20
可以直接使用 pip install xformer-0.0.20
参考:https://blog.csdn.net/Louis_12345/article/details/133636539


评论
发表评论